Your feet are the foundation of every movement you make, yet they’re often the most neglected part of the body. Long hours in shoes, limited mobility, and lack of awareness can weaken the muscles of the feet and ankles, affecting balance, posture, and overall stability. Yoga for the feet offers a simple yet powerful way to restore strength, improve mobility, and enhance proprioception from the ground up. In this guide, Olaben will explore 12 targeted yoga exercises designed to release tension, activate small stabilizing muscles, and help your feet feel stronger, more stable, and more connected, both on and off the mat.
How Your Feet Create Balance and Stability
Stability begins with how your weight is distributed across the four corners of the feet, the inner and outer heels, and the bases of the big and little toes. When these points work together, the arches and toes can actively support balance and efficient movement. Strong, responsive feet help transmit force from the ground upward, allowing the body to stay aligned and adaptable.
This process is guided by specialized sensory receptors called proprioceptors, which are found in the joints, muscles, tendons, and fascia. You can think of proprioceptors as the body’s internal guidance system. They constantly send and receive information between the feet and the brain, helping coordinate movement, adjust posture, and respond to change. This communication allows your body to stay mobile, stable, and responsive in everyday life.
For example, when you unexpectedly step off a curb and your foot, ankle, knee, and hip instinctively adjust so you can keep walking smoothly, that’s proprioception working well. If, instead, the ankle stiffens, movement becomes restricted, and you lose balance, it shows how limited proprioceptive response can increase instability.
12 Yoga Exercises to Increase Stability in Your Feet
Strong, flexible feet are the foundation for balance, posture, and smooth movement. These 12 yoga poses are designed to activate the muscles, stretch tight tissues, and improve stability from the ground up. Practicing them regularly can help your feet feel more supported, mobile, and ready for anything. both on and off the mat.
Myofascial Release & Mobility
Myofascial Release for the Bottom of Your Feet
Daily habits such as wearing rigid shoes, narrow toe boxes, high heels, or overly supportive insoles can limit natural foot movement and cause stiffness over time. Repetitive activities like running, cycling, or long periods of sitting and standing further reduce circulation and mobility in the feet.
Rolling the sole of the foot over a firm object helps soften tight tissues, especially the plantar fascia. This gentle self-massage increases blood flow, encourages tissue hydration, and restores sensory awareness in the feet. While it is not a cure for plantar fasciitis, it may help ease discomfort and reduce tension when practiced regularly.

How to do:
- Step 1: Sit on a chair or stand with both feet flat on the floor. Place a small ball, massage ball, or firm object under one foot.
- Step 2: Gently press your foot into the object and begin rolling it slowly along the sole, starting at the heel and moving toward the ball of the foot.
- Step 3: Continue rolling up to the base of the toes, keeping the movement controlled and your breath relaxed.
- Step 4: Shift the pressure slightly toward the inner arch, then toward the outer edge of the foot to explore different areas.
- Step 5: Roll beneath each toe one at a time, pausing briefly on any tight or tender spots while breathing steadily.
- Step 6: Continue for 2–3 minutes, adjusting pressure so it feels soothing rather than painful.
- Step 7: Remove the ball, notice the sensation in the foot, then switch to the other side.
Myofascial Release for the Tops of Your Feet
Massaging the tops of your feet helps improve circulation, relieve tension, and gently mobilize the small joints and connective tissues. This simple self-care practice not only supports foot health but also encourages mindfulness and awareness of your body’s sensations.

How to do:
- Step 1: Sit on a chair or stand comfortably, lifting one foot slightly off the ground.
- Step 2: Place a small ball or firm object under the top of your foot.
- Step 3: Gently press your foot into the ball and begin rolling it slowly along the top surface of your foot.
- Step 4: Move the ball carefully between each toe, massaging the spaces and joints.
- Step 5: Continue rolling for 1–2 minutes, keeping your movements slow and controlled.
- Step 6: Remove the ball and switch to the other foot, repeating the same steps.
Toe Stretch
Benefits: This stretch helps your toes and midfoot move naturally, which allows the small muscles of the feet to contract properly. When your toes and tarsal bones can spread and return together, the muscles get the chance to activate and support your feet during walking, running, or standing. It improves toe mobility, strengthens foot muscles, and helps maintain overall foot stability.
How to do:
- Step 1: Sit comfortably on a chair or on the floor, lifting one foot slightly so it is off the ground and relaxed.
- Step 2: Carefully thread your fingers in between each toe, making sure to maintain a gentle grip without causing discomfort.
- Step 3: Slowly spread your fingers and toes as widely as possible, creating as much space between them as feels comfortable while keeping the foot relaxed.
- Step 4: Pause briefly in this position, focusing on the stretch in your toes and the midfoot, and take a few deep, controlled breaths.
- Step 5: Repeat the spreading movement three times, maintaining steady control and awareness of the muscles activating in your foot.
- Step 6: After completing three repetitions on one foot, switch to the other foot and repeat the same process, making sure both feet receive equal attention.
Midfoot Splay
Benefit: This exercise opens up the midfoot and improves circulation, mobility, and space between the structures of the foot. It also relieves tension in often-overlooked areas, helping the foot feel lighter and more flexible, while promoting overall balance and stability.
How to do:
- Step 1: Sit comfortably in a chair or on the floor, lifting one foot slightly so it is relaxed and accessible.
- Step 2: Position your thumbs on the top of the foot and your fingers underneath the sole, ensuring a secure but gentle grip.
- Step 3: Slowly press your thumbs down while spreading your fingers to widen the sole of the foot slightly, focusing on creating space in the midfoot.
- Step 4: Move with controlled, deliberate motions, feeling the stretch in the arches and the small joints of the midfoot, while maintaining steady, relaxed breathing.
- Step 5: Continue this rolling and spreading motion for approximately one minute, paying attention to areas that feel tight or stiff.
- Step 6: After finishing with one foot, switch to the other foot and repeat the same sequence, ensuring both feet receive equal attention and care.
- Toe & Foot Strengthening
Spread Your Toes
Benefits: This simple toe yoga exercise helps improve toe mobility, foot flexibility, and circulation, while also warming up the muscles in your feet. Regular practice can increase your awareness of individual toe movement, strengthen the small intrinsic muscles of the foot, and support overall stability and balance. For those who spend long hours in shoes or on their feet, this exercise encourages relaxation in the toes and reduces stiffness, helping your feet feel more energized and ready for movement.
How to do:
- Step 1: Sit upright with good posture, keeping your back straight and your feet flat on the floor.
- Step 2: Focus on one foot and gently spread all of your toes as far apart as you can, aiming to create space between each toe.
- Step 3: If spreading all toes feels difficult at first, use your fingers to gently guide the toes apart, gradually allowing the muscles to strengthen over time.
- Step 4: Hold this position for up to 10 seconds, maintaining steady, relaxed breathing and noticing the stretch along the tops and sides of your toes.
- Step 5: Slowly release your toes and allow them to relax back onto the floor.
- Step 6: Repeat the same process with the other foot, ensuring both feet get equal attention and benefit.
Spread Your Toes and Arch Your Foot
Benefits: This exercise combines toe spreading with lifting the arches, providing an excellent way to enhance both toe and midfoot mobility simultaneously. It strengthens the small muscles in the feet, improves balance, and encourages proper engagement of the arches, which are crucial for walking, running, and standing efficiently. Practicing this regularly can help relieve tension, increase circulation, and improve overall foot stability, making it an essential move for anyone looking to maintain healthy, strong feet.
How to do:
- Step 1: Stand with your back straight, shoulders relaxed, and feet flat on the floor, maintaining good posture.
- Step 2: Focus on one or both feet and spread all your toes apart, creating space between each toe while keeping the foot grounded.
- Step 3: Slowly lift your heels off the floor so you are standing on your tiptoes, while keeping your toes spread and actively pressing into the ground.
- Step 4: Hold this lifted position for up to 10 seconds, keeping your balance, breathing steadily, and feeling the engagement of the arches and toe muscles.
- Step 5: Gently lower your heels back down to the floor, allowing your toes to relax and the arches to release.
- Step 6: Repeat the same movement with the other foot if needed, or practice both feet together, focusing on control and mindful movement throughout.
Lift and Drop Each Toe
Benefits: This exercise helps improve individual toe mobility and coordination, which strengthens the small muscles that support the arches and overall foot stability. By lifting and lowering each toe separately, you increase circulation, improve proprioception in the feet, and enhance balance during walking, running, or standing. It also helps reduce stiffness in the toes and joints, making the feet feel more responsive and agile. Regular practice can improve your ability to spread force evenly across the foot, reducing strain on other areas like the ankles and knees.

How to do:
- Step 1: Sit comfortably with your feet flat on the floor and your back straight, maintaining good posture.
- Step 2: Focus on one foot and gently lift your big toe while keeping the other toes relaxed and in contact with the floor.
- Step 3: Slowly lower the big toe back down, maintaining control and awareness of the muscles working.
- Step 4: Repeat the same movement with each of the remaining toes individually, lifting and lowering them one at a time.
- Step 5: Perform 2–3 sets per foot, moving slowly and deliberately to maximize engagement and coordination.
- Step 6: Switch to the other foot and repeat the same steps, making sure both feet receive equal attention and benefit.
Scrunch Your Toes
Benefits: Scrunching your toes strengthens the small intrinsic muscles on the bottom of the foot, which support the arches and help maintain overall foot stability. This exercise also improves toe flexibility, increases blood flow, and encourages better coordination between the toes and the rest of the foot. Practicing toe scrunches regularly can relieve tension, reduce stiffness from prolonged sitting or tight shoes, and enhance your ability to balance and adapt to uneven surfaces while walking or standing.
How to do:
- Step 1: Sit or stand comfortably with your feet flat on the floor and your back straight, keeping your posture relaxed but upright.
- Step 2: Focus on one foot and curl or scrunch all your toes downward toward the sole, pressing gently into the floor.
- Step 3: Hold the scrunched position for 2–3 seconds, feeling the muscles activating on the bottom of the foot.
- Step 4: Slowly release your toes, allowing them to relax and spread naturally on the floor.
- Step 5: Repeat the scrunching motion for 8–10 repetitions on one foot, maintaining control and steady breathing.
- Step 6: Switch to the other foot and repeat the same steps, ensuring both feet are worked evenly.
Stretching & Range of Motion
Broken Toe Stretch
Benefits: This exercise is specifically designed to improve dorsiflexion in the big toe, which is essential for an effective push-off during walking, running, or yoga poses like High Lunge, Plank, and Chaturanga Dandasana. By gently stretching the tissues that connect the toes through the soles of your feet, you encourage mobility in the joints and ligaments of the toes, reduce stiffness, and strengthen the connection between the big toe and the rest of the foot. Regular practice can improve your balance, foot stability, and overall efficiency of movement, while also supporting mindful awareness of the feet during yoga or daily activities.
How to do:
- Step 1: Begin seated in Vajrasana (Thunderbolt Pose) with a yoga block placed between your ankles at medium height.
- Step 2: Position your toes so they are flexed rather than resting flat on the floor, tucking your smaller toes under if necessary to maintain comfort.
- Step 3: Hug your inner heels and the knuckles of your big toes gently against the block, allowing the weight of your body and gravity to stretch the tissues along the soles of your feet.
- Step 4: Remain in this position for 5–8 deep breaths, focusing on the stretch and the gentle engagement of the toes and midfoot.
- Step 5: Release the stretch slowly and adjust your feet if needed before repeating or moving to the other foot.
Top of Foot Stretch
Benefits: The tops of your feet are often overlooked, yet keeping these areas mobile is crucial for overall foot stability and balance. This stretch specifically targets the midfoot bones and the area from the toes to the front of the shin, helping create space and mobility in this often tight region. Practicing this regularly can improve stability in standing poses, reduce tension, and potentially relieve discomfort related to shin splints. It also encourages circulation and flexibility in the upper foot, supporting healthy alignment throughout the foot and ankle.
How to do:
- Step 1: Sit in Vajrasana (a variation of Virasana) with a yoga block positioned between your ankles at medium height to support your posture.
- Step 2: Using your left hand, lift your left knee slightly off the floor until you feel a gentle stretch along the top of your left foot.
- Step 3: Hold the stretch for 4–6 deep breaths, focusing on relaxing the muscles and allowing the bones of the midfoot and toes to open gently.
- Step 4: Slowly lower your knee back down and release your foot, noticing any difference in tension or mobility.
- Step 5: Switch to the other foot and repeat the same steps, ensuring both feet are stretched evenly and mindfully.
Hand-to-Foot Pose
Benefits: This forward bend is excellent for calming the nervous system and encouraging the mind to slow down and turn inward. The physical contact between the hands and feet activates a large portion of the brain responsible for sensory and motor functions, enhancing the mind-body connection. In addition to the mental benefits, this pose gently stretches the hamstrings, calves, and the muscles along the spine, while also improving flexibility in the feet and ankles. Regular practice can help you cultivate mindfulness, reduce stress, and promote overall body awareness.

How to do:
- Step 1: Begin either standing with your feet hip-distance apart or sitting on a chair with your feet flat on the floor.
- Step 2: Hinge forward at your hips, bringing your chest toward your thighs while keeping your spine long and allowing your neck to relax naturally.
- Step 3: Slide your hands underneath your feet with palms facing up, so that your toes touch the creases of your wrists.
- Step 4: If you are standing and the stretch feels intense, bend your knees slightly to maintain comfort and avoid strain.
- Step 5: Hold the position for five deep breaths, focusing on the sensation of lengthening in your spine and the gentle stretch in your feet and hamstrings.
- Step 6: Slowly release by lifting your chest back to upright and removing your hands from beneath your feet, returning to a neutral position.
Ankle Dorsiflexion Stretch
Benefits: This stretch helps improve dorsiflexion, which is the ability to flex the foot upward toward the shin. Dorsiflexion is essential for maintaining balance and stability in yoga poses such as Utkatasana (Chair Yoga Pose), Malasana (Garland Pose), and other standing balancing poses. It also enhances mobility for Adho Mukha Svanasana (Downward-Facing Dog Pose) and other movements that require strong, flexible ankles. Regular practice can help prevent stiffness in the ankle joint, improve foot alignment, and increase overall lower limb stability.

How to do:
- Step 1: Start in a kneeling lunge position with your left foot forward and your right knee back on the floor.
- Step 2: Place your left hand gently across the top of your left foot, keeping your entire foot and heel grounded on the mat.
- Step 3: Slowly bend your left knee as far as you comfortably can while maintaining contact between your heel and the ground.
- Step 4: Focus on the stretch along the front of your ankle and shin, keeping your posture steady and breathing deeply.
- Step 5: Remain in this position for one minute, maintaining a controlled and mindful stretch.
- Step 6: Release the stretch carefully, straighten your left leg, and switch sides if desired to ensure both ankles are evenly worked.
Tips When Practicing Yoga for the Feet
- Warm up properly: Begin each session with gentle movements to wake up the muscles, joints, and connective tissues in your feet, toes, and ankles. Even simple ankle circles, toe wiggles, or rolling your feet on a small ball can prepare your feet for deeper stretches and weight-bearing poses, reducing the risk of strain or injury.
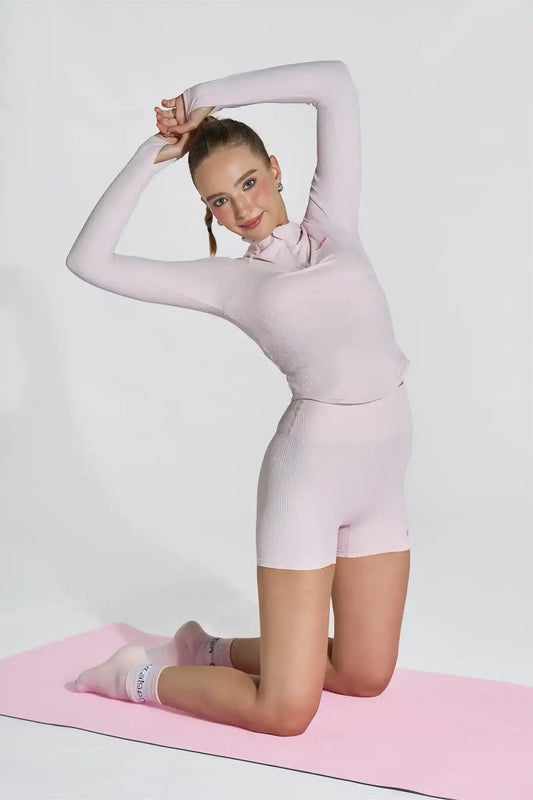
- Wear comfortable, flexible yoga clothing: Choose yoga outfits that allow full freedom of movement, such as sport tops like crop tops, women’s short-sleeve or long-sleeve athletic tops, paired with leggings, stretchy yoga pants, or fitted athletic shorts. Avoid clothing that is too tight around the hips, calves, or ankles, as it may restrict mobility in poses requiring dorsiflexion, toe spreading, or forward folds. Breathable fabrics help you stay comfortable and focused throughout your practice.
- Use supportive props and accessories: A high-quality yoga mat provides cushioning and traction for your feet, especially in kneeling, seated, or standing poses. Consider using yoga blocks, small massage balls, or a yoga strap to assist with stretches and improve alignment. You can also use yoga socks for better grip or comfort, and accessories like hats, headbands, or socks to keep sweat and distractions minimal. Having the right props makes your practice safer, more effective, and enjoyable.
- Practice consistently and progressively: Even a few minutes a day can make a noticeable difference in foot strength, mobility, and balance. Gradually increase the intensity and duration of your exercises as your feet adapt, but avoid forcing stretches that cause sharp pain. Consistency is more important than intensity for long-term improvement.
- Listen to your body and adjust: Pay close attention to how your feet and ankles feel during each pose. Mild discomfort is normal when stretching or strengthening, but sharp pain is a signal to back off or modify the movement. Over time, you will learn your body’s limits and gain better control over your foot muscles and alignment.
Conclusion
Yoga for the feet strengthens, stretches, and mobilizes your toes, arches, and ankles, improving balance, stability, and overall foot health. With consistent practice, supportive clothing, and the right props, your feet become more flexible, resilient, and connected, forming a strong foundation for every movement both on and off the mat.